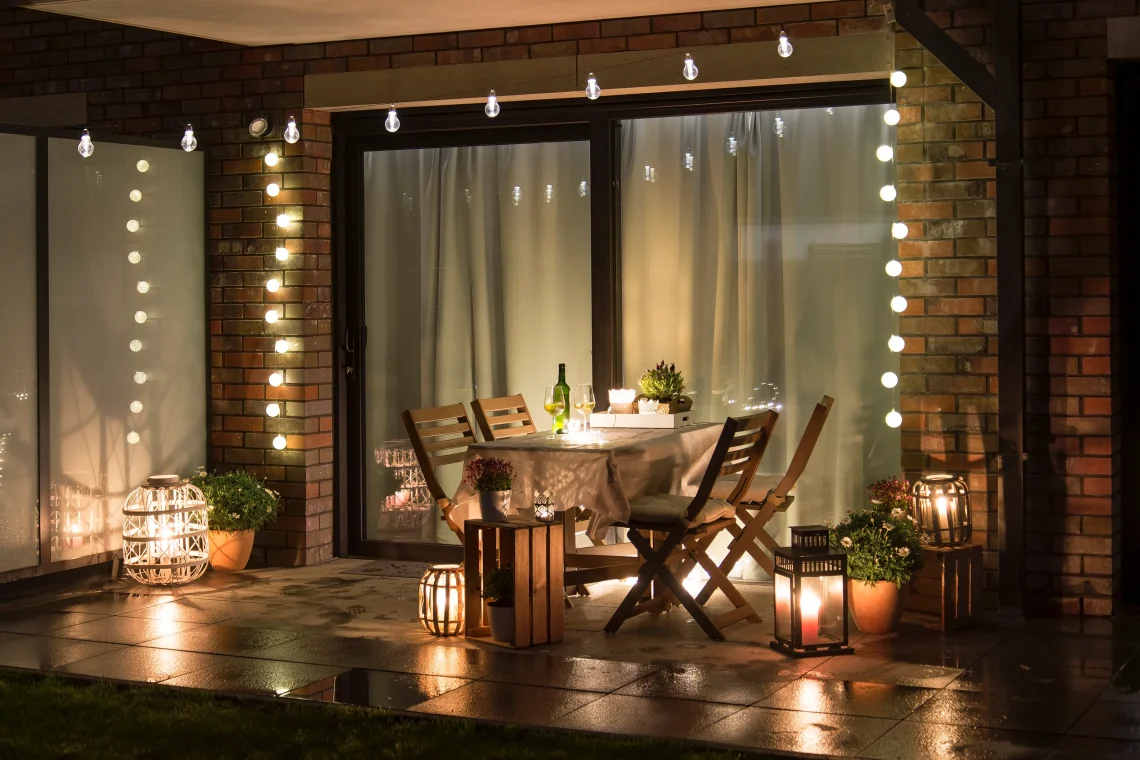
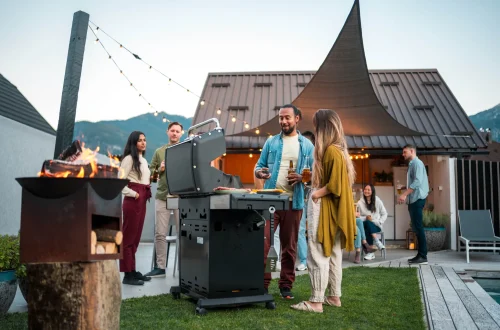
The right lighting does far more than simply illuminate a dark space – it creates ambiance, defines areas, and extends the hours you can enjoy your outdoor living space. A well-lit patio becomes an enchanting evening retreat, perfect for entertaining guests, enjoying a quiet dinner, or simply unwinding after a long day. The key to successful outdoor lighting lies in layering different light sources to create depth and visual interest. In this comprehensive guide, we’ll explore five creative lighting ideas that will transform your patio into a magical nighttime oasis, each with its own unique personality and function.
Idea 1: Under-Rail & Stair Lighting with LED Strips
Hidden illumination creates a modern, “floating” effect that’s both functional and visually striking. LED strip lights installed under railings or stair risers provide subtle, ambient lighting that guides movement while creating a magical, suspended appearance for your outdoor structures.
Installation Process:
Start by selecting waterproof LED strips rated for outdoor use. These strips typically come with an adhesive backing, making installation straightforward. For stair risers, measure the length of each riser and cut the LED strip accordingly, ensuring you leave a small gap at each end to prevent damage when stepping on the treads.
For under-rail lighting, consider using LED strips with a clear protective cover to extend their lifespan. Drill small channels into the bottom of the rail if your design allows, or use adhesive clips to secure the strips. Ensure all connections are watertight using appropriate connectors and sealant.
Pro Tip: Use adhesive-backed mounting channels specifically designed for LED strips. These provide a clean, professional look and protect the lights from direct exposure to the elements.
The beauty of under-rail lighting extends beyond aesthetics. It significantly improves safety by highlighting potential trip hazards and guiding safe passage along walkways and stairs, particularly important for evening entertaining. Choose warm white LEDs (2700K-3000K) to create a cozy, inviting atmosphere.
For added control and energy efficiency, connect the LED strips to a dimmer switch or smart home system. This allows you to adjust the brightness based on the occasion – bright for evening entertaining, dim for romantic dinners, or completely off during moonlit nights.
Idea 2: Uplighting Trees and Architectural Features
Uplighting is a dramatic technique that involves positioning spotlights at ground level and aiming them upward to illuminate trees, architectural features like columns, or the texture of stone walls. This creates striking visual effects, casting beautiful shadows and highlighting the natural or architectural elements of your outdoor space.
Consideration: Be mindful of the light spread when uplighting trees. Some LED fixtures have adjustable beam angles, allowing you to focus the light on specific features or broaden the illumination based on the tree’s size and shape.
Best Trees for Uplighting:
Uplighting works exceptionally well on trees with interesting bark texture, like sycamores or birch, or those with distinctive branching patterns such as Japanese maples. Evergreen trees like pines or spruces maintain their dramatic silhouette year-round. Palm trees, with their unique trunks and fronds, create exotic shadows when uplit.
For architectural features, focus on elements that have depth, texture, or unique shapes. Stone walls reveal their natural texture under uplighting, while columns become prominent focal points. Avoid uplighting young, thin trees, as the effect may be too harsh.
Lighting Equipment and Placement:
Low-voltage LED landscape lights are ideal for uplighting. These are safer to install, more energy-efficient, and create a focused beam without being overly harsh. Position the lights several feet away from the base of the tree or feature to achieve the desired angle. The further the light is from the object, the wider the area of illumination will be.
Experiment with placement before securing the lights permanently. Temporary placement allows you to see the effect during evening hours and make adjustments. Consider using multiple small lights positioned around the base of a large tree for more even illumination.
Idea 3: DIY Mason Jar or Tin Can Lanterns
For a charming, rustic ambiance, DIY mason jar or tin can lanterns offer a personal touch that’s both budget-friendly and customizable. These luminaries add warmth and character to any patio setting, especially when grouped together or hung at varying heights.
Safety Note: If using real candles, ensure the jars are heat-resistant and placed away from flammable materials. Solar-powered or LED candles are safer alternatives that provide similar ambiance without fire hazards.
Creating Mason Jar Lanterns:
Clean mason jars thoroughly and remove any labels. Sand the exterior surface with fine-grit sandpaper to create a frosted effect that diffuses the light more softly. For a decorative touch, wrap twine or wire around the neck of the jar and add small ornaments like dried flowers or small bells.
Place a tea light – either real or battery-operated – inside each jar. If using real candles, ensure the jar is tall enough to contain the flame safely. For added visual interest, place river rocks or marbles at the bottom of the jar before adding the candle.
Creating Tin Can Lanterns:
Using metal cans (like coffee cans or large soup cans), clean them thoroughly and remove any sharp edges. Use a hammer and nail to punch decorative patterns into the sides of the cans. The patterns can be simple geometric shapes, leaves, or even silhouettes – let your creativity guide the design.
Paint the cans if desired, using outdoor paint for durability. Black or dark colors create a striking contrast when light shines through the holes. Place LED lights or tea lights inside and hang using wire or rope. The punched patterns will cast beautiful shadows across your patio.
Creative Variation: Create a color palette by using colored glass or translucent plastic sheets inside the jars. Cut these materials to fit and place them behind the light source to create colored light effects.
Idea 4: Solar-Powered Path and Garden Lights
Solar-powered lights offer an eco-friendly, maintenance-free solution for defining walkways, garden beds, and patio edges. These lights charge during the day using built-in solar panels and illuminate automatically at dusk, providing consistent lighting without the need for electrical wiring.
Selection and Placement:
When choosing solar lights, consider the required brightness level for your application. Path lights are typically brighter than decorative garden lights. Look for lights with lithium-ion batteries and high-efficiency LEDs for better performance and longer lifespan.
Placement is crucial for solar light effectiveness. Install them where they’ll receive at least 6-8 hours of direct sunlight daily. Avoid placing them under trees, eaves, or other structures that cast shadows during peak sunlight hours.
Types of Solar Lights:
- Path Lights: Tall, stake-mounted fixtures that illuminate walkways and provide guidance.
- Landscape Spotlights: Focused beams for highlighting specific plants, sculptures, or architectural features.
- String Lights: Connected solar panels with multiple light points, perfect for creating linear illumination.
- In-ground Lights: Flush-mounted fixtures that provide subtle, low-level lighting along borders.
Maintenance Tips:
Periodically clean the solar panels with a soft, damp cloth to remove dust, leaves, or debris that might block sunlight. In colder climates, remove and store solar lights during winter months to extend their lifespan. Check and replace batteries as needed, typically every 1-2 years depending on usage and quality.
For optimal performance, position solar lights so the panel faces south (in the Northern Hemisphere) for maximum sun exposure. During winter months, when daylight hours are shorter and sun angles are lower, expect reduced performance from solar lights.
Idea 5: The Classic String Light, Elevated
While string lights are a common choice for outdoor patios, there are numerous creative ways to install and use them that go far beyond basic hanging. When thoughtfully installed, string lights can create a canopy effect that transforms your outdoor space into an intimate, starlit retreat.
Creating a Canopy Effect with Poles:
Install vertical poles around your patio perimeter (or use existing structures) and suspend string lights between them at varying heights to create a three-dimensional canopy. Use tensioning cables and turnbuckles to ensure the lights are taut and properly supported. This creates a theater-like ambiance, with warm light filtering down from above.
For a more permanent installation, consider mounting brackets to the poles that allow for easy removal of lights during winter or for special occasions. This approach works particularly well for rectangular patios where you can create a grid pattern of lights.
Wrapping Lights Around Architectural Features:
If you have a pergola, gazebo, or arbor, wrapping string lights around the beams and rafters creates stunning visual depth. Start at one end and methodically wrap the lights around each wooden element, ensuring they’re evenly spaced and secured with clear wire or clips.
For pergolas, consider wrapping the horizontal beams first, then adding vertical strings between them. This creates a layered lighting effect that illuminates both the structure and the space below.
Pro Tip: Use larger, statement-making Edison bulbs for a vintage industrial look, or opt for LED bulbs in warm white to create the same effect with lower energy consumption and cooler operation.
Alternative Installation Methods:
Attach string lights to trees surrounding your patio for a natural, organic feel. Secure lights using tree-friendly straps or hooks that won’t damage bark. This creates a magical forest-like atmosphere, especially when lights are hung at different heights.
For privacy screens or fences, string lights can be attached using hooks or clips, creating a soft, glowing backdrop that enhances the sense of enclosure while maintaining visual appeal.
Planning and Implementing Your Lighting Scheme
Creating an effective outdoor lighting design involves more than just installing individual lighting elements. Consider these principles to achieve a cohesive, functional look:
The Three-Layer Lighting Approach:
The most successful outdoor lighting schemes incorporate three types of lighting:
- Ambient Lighting: Provides general illumination for safe navigation and general visibility.
- Task Lighting: Focuses on specific areas where activities occur, such as cooking surfaces or dining tables.
- Accent Lighting: Highlights specific features like plants, water elements, or architectural details.
Design Tip: Plan your lighting layout on paper first, marking where you want each type of light to be placed. This helps ensure you’re not over or under-lighting different areas of your patio.
Color Temperature Considerations:
Select lights with consistent color temperatures throughout your space for a cohesive look. Warm white lighting (2700K-3000K) creates a cozy, inviting atmosphere that’s perfect for most outdoor entertaining areas. Cooler temperatures (4000K-5000K) can feel harsh in residential settings but might be appropriate for task lighting areas.
Energy Efficiency and Sustainability:
When possible, choose LED lighting options. LEDs consume significantly less energy, have longer lifespans, and generate less heat than incandescent bulbs. Many outdoor LED fixtures also offer dimming capabilities, allowing you to adjust the ambiance based on the occasion.
Seasonal and Occasional Lighting Adaptations
Your outdoor lighting should be adaptable for different seasons and special occasions, maximizing its utility throughout the year.
Seasonal Adjustments:
During summer months, when evenings are longer, consider using lighter, brighter lighting to accommodate extended outdoor activities. In fall and spring, when temperatures are cooler, warmer lighting creates a cozy atmosphere that encourages outdoor time despite the drop in temperature.
Winter lighting should focus on safety and minimal use, potentially limiting lighting to pathways and entrances. Some lighting fixtures can be removed or covered during harsh winter months to extend their lifespan.
Special Occasion Customization:
Design your lighting system with flexibility in mind for special events. Use smart switches or timers that allow you to create different lighting scenes. For example, dim lighting for romantic dinners, brighter lighting for large gatherings, or even synchronized lighting for parties.
Consider adding a few special lighting elements that can be brought out for holidays or celebrations – such as colored lights for summer festivals or string lights with ornaments for winter holidays.
Installation Tip: Install multiple outdoor outlets with GFCI protection during your initial setup. This allows for easy addition of decorative lighting, portable speakers, or other electrical needs for special events.
Maintenance and Longevity of Outdoor Lighting
Proper maintenance ensures your outdoor lighting continues to function safely and effectively for years to come.
Regular Maintenance Tasks:
Inspect all outdoor lighting fixtures monthly for signs of wear, damage, or loose connections. Clean light covers and solar panels regularly to maintain optimal performance. Replace burnt-out bulbs promptly to maintain consistent lighting ambiance.
Check that all mounting hardware is secure, especially after severe weather. Inspect electrical connections (if applicable) for corrosion or damage, and ensure that any outdoor electrical boxes remain properly sealed.
Seasonal Maintenance:
Before winter, clean all fixtures thoroughly and remove any elements that might be damaged by freezing temperatures. This includes removing solar lights in areas with harsh winters and storing them properly.
Spring maintenance should include a thorough cleaning, checking all connections, and replacing any bulbs that didn’t survive the winter. Inspect for any damage from weather or animals.
Safety Reminder: Always turn off power at the source before performing any maintenance on electrical lighting fixtures. For complex electrical work, consult a licensed electrician.
Conclusion
Transforming your patio with creative outdoor lighting is one of the most impactful improvements you can make to your outdoor living space. The five ideas presented – under-rail lighting, uplighting, DIY lanterns, solar lights, and elevated string lighting – offer diverse approaches to lighting design that can be combined and adapted to fit your specific space and style preferences.
The key to successful outdoor lighting is layering different types of illumination to create a dynamic and inviting atmosphere. Consider safety, functionality, and aesthetics when planning your lighting scheme, and don’t be afraid to start small and expand over time.
Remember that lighting can dramatically change the perceived size and mood of your space. Properly implemented, it extends the hours you can enjoy your patio and creates the perfect ambiance for any occasion – from intimate dinners to large gatherings.
Whether you choose high-tech LED solutions or charming DIY lanterns, the most important aspect is that your lighting reflects your personal style and enhances your outdoor living experience. With proper planning and maintenance, your creative lighting ideas will provide years of beautiful, functional illumination for your patio.


