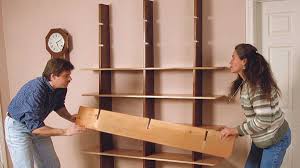
The beauty of upcycling and working with reclaimed wood cannot be overstated. There’s something deeply satisfying about transforming discarded materials into beautiful, functional pieces for your home. This approach celebrates sustainability while creating unique items that have character and history. If you’ve ever looked at your scrap wood pile and wondered what to do with it, this guide will challenge you to see that pile as a treasure trove of potential projects. Reclaimed wood projects are not only environmentally friendly but also offer unique aesthetics that new lumber simply cannot replicate. The character, patina, and imperfections of reclaimed wood give each project its own story, making it a one-of-a-kind piece that adds personality to your home. In this comprehensive guide, we’ll explore five easy projects that showcase the beauty of reclaimed wood while building your confidence as a woodworker.
Project 1: Rustic Bath Tray
A simple bath tray made from a single board with small feet is perfect for holding a book and a cup of tea during relaxing bath time. This project is ideal for beginners working with reclaimed wood because it requires minimal tools and showcases the natural beauty of aged lumber.
Materials Needed:
- One piece of reclaimed wood, approximately 14″ x 6″ x 3/4″
- Four small wooden feet (or use wooden blocks as feet)
- Wood glue
- Finishing materials (optional)
Reclaimed Wood Selection: Look for wood that has a nice surface texture or interesting character. Avoid wood that has been chemically treated or painted with unknown substances, especially if the tray might come into contact with skin.
Construction Process:
Start by sanding the reclaimed wood board to remove any splinters or rough spots while preserving its character. If the board has an interesting shape or edge, consider incorporating that into your design rather than making it perfectly rectangular.
Attach four small wooden feet to the bottom corners of the board using wood glue and small finishing nails if needed. The feet should be high enough to prevent the tray from sliding on wet surfaces but not so tall that it becomes unstable.
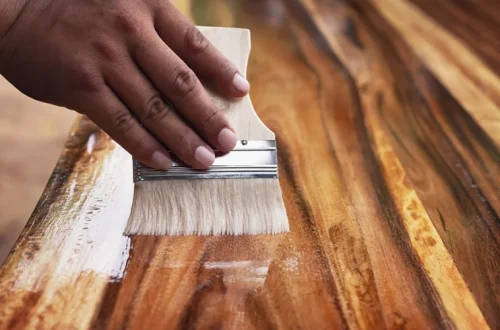
Finish with a food-safe oil like mineral oil or tung oil if desired, but the natural look of reclaimed wood is often beautiful enough without additional finishing.
Project 2: Wall-Mounted Coat Rack
A character-filled board with a few stylish hooks creates both functional and decorative wall decor that’s perfect for any entryway. This project is perfect for showcasing the natural beauty and history of reclaimed wood while providing practical storage.
Materials Required:
- Reclaimed wood board, 24-36 inches long, 4-6 inches wide
- 3-5 decorative hooks (vintage or modern)
- Wood screws for hanging
- Wall anchors if needed
- Sandpaper
Planning and Installation:
Measure and mark the positions for your hooks on the reclaimed board. Space them evenly, typically 4-5 inches apart, depending on the size of items you’ll be hanging.
Drill pilot holes for the hooks to prevent splitting the reclaimed wood, which may be more brittle than new lumber. The natural variations in reclaimed wood make each coat rack truly unique.
To hang the rack, locate wall studs if possible, or use appropriate wall anchors for your wall type. Ensure the rack is level and securely attached.
Design Variation: Consider adding small shelves below the hooks for keys, sunglasses, or small items. This can be achieved by attaching small pieces of reclaimed wood as brackets.
Project 3: A Set of Wooden Coasters
Small scraps of reclaimed wood can be glued together and cut into squares to create rustic coasters with unique character. This project is perfect for using up small pieces of wood that might otherwise be discarded.
Size Consideration: Standard coasters are typically 4×4 inches, but reclaimed wood coasters can be made in various sizes to accommodate different drinkware. Consider making a mix of sizes for visual interest.
Construction Process:
Collect small pieces of reclaimed wood that are relatively flat and free of significant damage. Pieces that are 1-2 inches wide work well for this project.
Glue the small pieces together using wood glue, alternating grain directions and colors for visual appeal. Clamp the assembled pieces until the glue is completely dry according to manufacturer instructions.
Once dry, cut the glued block into individual coaster squares using a miter saw or hand saw. Sand all surfaces smooth, taking care not to round the edges.
Apply a protective finish such as food-safe mineral oil or a thin coat of polyurethane to protect the wood and make the coasters water-resistant.
Finishing Options:
- Natural Finish: Light sanding to smooth and preserve the wood’s character
- Tung Oil: Penetrating oil that enhances the wood’s natural beauty
- Food-Safe Sealant: For maximum protection against moisture
Project 4: Tablet or Cookbook Stand
A simple design with a ledge and a hinged back support makes for a practical stand that’s perfect for displaying recipes or providing hands-free reading. This project uses minimal materials and can be completed in a few hours.
Materials and Dimensions:
- Base piece: 10″ x 6″ x 3/4″ (reclaimed wood)
- Support piece: 10″ x 8″ x 3/4″ (reclaimed wood)
- Small hinges (2)
- Wood screws
- Wood glue
Construction Steps:
Cut a small lip on the front edge of the base piece to prevent items from sliding off. This lip can be created by attaching a thin strip of wood or by routing a small groove.
Attach the support piece to the base using hinges, allowing it to fold down flat when not in use. Position the hinges to allow the support to angle back at approximately 15-20 degrees, which provides optimal viewing angle.
Sand all surfaces smooth, paying special attention to edges that will be handled frequently. The character of reclaimed wood adds visual interest to this functional piece.
Safety Note: Ensure hinges are securely attached and that the stand is stable when holding a device. Test with your tablet or cookbook before regular use.
Project 5: Decorative Arrow or Mountain Range Wall Art
Cutting pallet wood into simple shapes creates rustic wall decor that’s both functional and artistic. This project allows you to create geometric wall art that reflects the industrial origins of many reclaimed wood sources.
Creative Possibilities: This concept can be expanded to create other geometric shapes like triangles, hexagons, or even abstract representations of your favorite landscape elements.
Creating Arrow Wall Art:
Sketch your arrow design on the reclaimed wood before cutting. Use a jigsaw or handsaw to carefully cut out the shape. For a mountain range effect, create multiple arrows of different sizes and arrange them in a row.
Sand the cut edges to remove splinters while maintaining the rustic character of the wood. The natural color variations in reclaimed wood add depth to simple geometric forms.
Mount the pieces to the wall using appropriate hardware. For a more dynamic look, stagger the heights of multiple pieces in your mountain range.
Design Tip: Consider painting or staining some pieces darker or lighter to create additional visual contrast and depth in your wall art.
Mountain Range Variation:
Create multiple triangular shapes of varying heights to simulate a mountain range. Arrange them from left to right in a visually pleasing composition before mounting. The reclaimed wood’s natural color variations will enhance the landscape effect.
Tips for Working with Reclaimed Wood
Working with reclaimed wood presents unique challenges and opportunities. Understanding these differences will help you create better projects and avoid common pitfalls.
Cleaning Reclaimed Wood:
Before using reclaimed wood, thoroughly clean it to remove any dirt, grime, or chemical residues. Use a wire brush to remove loose paint or stain, and consider using a solution of mild detergent and water for stubborn dirt.
For wood that has been painted or stained, chemical strippers may be necessary to reveal the wood grain underneath. Always work in a well-ventilated area and follow safety instructions.
Removing Nails and Hardware:
Safety is paramount when removing nails from reclaimed wood. Use protective equipment and take your time. For stubborn nails:
- Use a nail puller or pry bar to carefully extract nails
- Cut off nails that cannot be removed with a hacksaw or reciprocating saw
- Look for embedded nails by running a magnet along the surface
- Mark nail locations with a pencil before working
Sanding and Preparation:
Reclaimed wood often requires more extensive sanding than new lumber due to surface irregularities, old finishes, and weathering. Start with coarser grit sandpaper (80-100 grit) and progress to finer grits (220 grit) for a smooth finish.
Pay extra attention to areas where old hardware was removed, as these spots may be dented or have different textures.
Safety Considerations for Reclaimed Wood Projects
While reclaimed wood projects are rewarding, they present unique safety challenges that you must consider before beginning your work.
Identifying Potentially Hazardous Wood:
Avoid using wood that has been chemically treated, especially older pressure-treated lumber that may contain arsenic. Look for stamps or tags indicating chemical treatments.
Old painted wood may contain lead, particularly in homes built before 1978. If you suspect lead paint, use appropriate safety measures or avoid using the wood for projects where paint chips might be ingested.
Chemical Exposure: When working with unknown reclaimed wood, wear a dust mask and work in a well-ventilated area. Consider having chemically treated wood tested if you’re unsure.
Tool Safety with Reclaimed Wood:
Reclaimed wood often contains hidden nails, staples, or other metal objects that can damage tools or cause injury. Always check wood carefully before cutting or drilling.
Wear safety glasses and hearing protection when operating power tools. Keep your workspace clean and organized to prevent accidents.
Maximizing Your Reclaimed Wood Potential
Getting the most from your reclaimed wood requires planning and creativity. Here are strategies to maximize the potential of your materials.
Sorting and Organizing:
Sort your reclaimed wood by size, type, and quality. This makes it easier to find appropriate pieces for specific projects. Create separate piles for:
- Structural pieces (no major defects)
- Decorative pieces (with character marks)
- Practice pieces (with significant defects)
- Small scraps (ready for projects like coasters)
Storage Tip: Store reclaimed wood in a dry, covered area to prevent additional weathering or moisture damage. Elevate pieces on blocks to prevent ground contact.
Project Planning with Reclaimed Wood:
When planning projects with reclaimed wood, be flexible with your design. Allow the character of the wood to influence your final design rather than forcing it to meet exact specifications.
Embrace the imperfections and unique characteristics of reclaimed wood as design features rather than flaws to be hidden.
Conclusion
Inspiring readers to give their scrap wood a second life and add unique, handmade touches to their home, these five projects demonstrate the incredible potential that exists in reclaimed wood. Each project showcases how discarded materials can be transformed into functional and beautiful pieces that reflect both sustainability and personal craftsmanship.
The projects we’ve explored range from practical items like coasters and coat racks to decorative pieces like wall art, proving that reclaimed wood can serve any function in your home. The character, patina, and history of reclaimed wood simply cannot be replicated with new materials, making each piece truly one-of-a-kind.
Remember that working with reclaimed wood requires patience and flexibility. The process may not always go according to plan, but the unique results are worth the extra effort. Each piece of reclaimed wood has its own story, and by incorporating it into your home, you’re creating new chapters in that story.
Start with smaller projects to build confidence, then gradually take on more complex builds. The more you work with reclaimed wood, the better you’ll become at identifying potential projects and working around the unique challenges it presents.
Happy building, and may your scrap wood pile never look the same way again!