Painting kitchen cabinets is the most transformative, budget-friendly kitchen upgrade you can do in your home. The impact of this project is immediately visible and dramatically changes the entire aesthetic of your space. However, achieving a professional-looking result requires understanding that success is 90% preparation. Many homeowners attempt this project only to be disappointed with the results, often due to inadequate preparation or using the wrong materials. This comprehensive guide will walk you through every step of the process, from initial preparation to the final protective topcoat, ensuring your cabinets look as if they were professionally refinished. The key to success lies in understanding that cabinet painting is not a quick weekend project but rather an investment of time that pays dividends in both home value and visual appeal.
Step 1: Prep is Everything (The Non-Negotiable Step)
Proper preparation is the foundation of any successful cabinet painting project. This step cannot be rushed or skipped without compromising the final result. The time invested in preparation will be evident in the final appearance and durability of your painted cabinets.
Complete Removal Process:
Remove all cabinet doors, drawers, and hardware (handles, knobs, hinges). This allows you to work on flat surfaces and ensures even coverage. Label everything systematically using painter’s tape and a marker – mark doors to identify which cabinet they came from. Remove all interior components like shelf supports and drawer slides as well.
Take photos of the cabinet interiors and hardware placement before removal. This serves as a reference during reassembly and helps ensure everything goes back in the correct place.
Organization Tip: Create a detailed inventory system using a large piece of cardboard or a photography app. Place doors and hardware in labeled sections to prevent mix-ups during reassembly.
Thorough Cleaning:
Kitchen cabinets accumulate grease, cooking oils, and grime over time, which prevents proper paint adhesion. Clean all surfaces thoroughly with a degreasing cleaner specifically designed for kitchen surfaces. TSP (trisodium phosphate) or a TSP substitute works exceptionally well for this purpose.
Pay special attention to areas around handles and frequently touched surfaces where oils accumulate. Wipe surfaces multiple times with clean, damp cloths to remove all cleaning residue, then allow everything to dry completely before proceeding.
Step 2: Sand for Adhesion
Sanding is crucial for creating the proper surface texture that allows primer and paint to adhere properly. This step is particularly important for cabinets that have a factory finish, which is typically smooth and non-porous.
Sanding Technique:
You don’t need to strip the old finish completely, but you do need to scuff-sand all surfaces to create “tooth” for the primer to grip. Use 120-150 grit sandpaper for the initial sanding, followed by 220 grit for a smooth finish before priming.
Sand with the grain of the wood when possible, and ensure all surfaces (not just visible ones) are sanded for proper adhesion. Don’t forget to sand the edges and back sides of doors if they’ll be visible.
Safety Note: Wear a dust mask and safety glasses during sanding. Kitchen cabinet refinishing generates a lot of fine dust that can be harmful if inhaled, especially with older finishes that might contain lead.
Removing Sanding Dust:
After sanding, thoroughly clean all surfaces with a tack cloth to remove all sanding dust. Any remaining dust will interfere with paint adhesion and show up as imperfections in the final finish.
Step 3: Prime, Prime, Prime
Applying a high-quality primer is absolutely critical for achieving a professional result. Primer serves multiple functions: it seals the surface, provides a good base for paint adhesion, and prevents bleed-through from the existing finish.
Choosing the Right Primer:
Use a high-quality, stain-blocking bonding primer specifically designed for kitchen cabinets. Oil-based primers provide excellent adhesion but require mineral spirits for cleanup. Latex bonding primers are easier to work with and clean up with soap and water.
Shellac-based primers (like Zinsser B-I-N) work exceptionally well on problem surfaces and provide excellent blocking properties. However, they dry quickly and require fast work.
Application Techniques:
Apply primer in thin, even coats using a high-quality brush and roller combination. Start with a brush for detailed areas and corners, then use a mini foam roller for flat surfaces to eliminate brush marks.
Allow the primer to dry completely according to manufacturer instructions before applying additional coats. Most cabinets benefit from two coats of primer for the best results.
Primer Application Tip: Don’t be afraid to use more primer on areas where the old finish was dark or colorful. These spots may require additional coverage to prevent the color from bleeding through.
Step 4: Choose the Right Paint
Not all paints are created equal, especially for high-traffic surfaces like kitchen cabinets. The paint you choose will significantly impact the durability and appearance of your finished cabinets.
Recommended Paint Types:
Durable, self-leveling paint specifically designed for cabinets is ideal. Alkyd enamel paints provide exceptional durability and a smooth, hard finish that resists moisture and wear. These are oil-based and provide the most professional results.
High-quality latex paints with cabinet-specific formulations also work well and offer easier cleanup. Look for paints labeled as “cabinet and trim” for the best results.
Paint Finish Options:
- Satin: Offers a subtle sheen that hides imperfections well and is easy to clean. This is the most popular choice for kitchen cabinets.
- Semi-gloss: Provides more shine and durability but shows imperfections more clearly. This offers maximum resistance to moisture and wear.
- Matte: Hides imperfections the best but is more difficult to clean and less durable than higher-sheen finishes.
Color Considerations:
Consider the lighting in your kitchen when choosing a color. Test paint colors in different lighting conditions throughout the day. Keep in mind that kitchen colors will be viewed in various lighting conditions, from bright morning sun to evening artificial light.
Step 5: Application for a Smooth Finish
The application method you choose will significantly impact the final appearance of your painted cabinets. Professional-looking results require attention to technique and patience.
Brush and Roller Method:
Use a high-quality angled brush (2-3 inches wide) for detailed areas, corners, and raised panels. Apply paint in the direction of the wood grain, using long, smooth strokes. Follow up with a high-density foam roller for flat surfaces to eliminate brush marks.
Load your brush properly – dip only about 1/3 of the bristle length in paint to avoid drips. Apply paint in thin, even coats rather than one thick application.
Paint Sprayer Method:
For the most professional-looking finish, consider using a paint sprayer. HVLP (High Volume, Low Pressure) or airless sprayers can achieve a smooth, factory-like finish.
Spraying requires more preparation (protecting surrounding areas) but provides the smoothest possible finish. Practice on scrap pieces first to get comfortable with the technique.
Coating Strategy:
Apply two thin coats rather than one thick coat. Allow each coat to dry completely before applying the next. Light sanding with 220-grit sandpaper between coats (once the paint is completely dry) will ensure a perfectly smooth finish.
Application Tip: Maintain a wet edge when painting large surfaces to prevent visible lap marks. Work in small sections and blend each area into the next while the paint is still wet.
Step 6: Allow for Curing Time
Understanding the difference between “dry time” and “cure time” is crucial for protecting your newly painted cabinets and ensuring long-term durability.
Dry Time vs. Cure Time:
Dry time refers to when the paint is no longer wet to the touch, which typically takes 24 hours for cabinet paint. This is when you can carefully rehang doors and reinstall hardware.
Cure time is the period needed for the paint to reach full hardness and durability, which can take 2-4 weeks depending on the paint type and environmental conditions. During this time, be gentle when handling cabinet doors and avoid using harsh chemicals for cleaning.
Patience Warning: Resist the temptation to use your cabinets heavily before they’re fully cured. Heavy use during the curing period can cause permanent damage to the finish.
Care During Curing:
For the first month, avoid placing hot items directly on painted surfaces, use coasters and trivets, and clean gently with mild soap and water. Gradually transition to normal use as the paint fully cures.
Troubleshooting Common Cabinet Painting Problems
Even with careful preparation and application, problems can sometimes occur. Understanding how to address these issues will help you achieve professional results.
Problem: Brush Marks and Orange Peel Texture
Solution: Ensure you’re using good quality tools, applying thin coats, and maintaining a wet edge. If brush marks appear, lightly sand with fine grit sandpaper after the paint dries completely, then apply another thin coat.
Problem: Paint Peeling or Poor Adhesion
Solution: This usually indicates inadequate preparation. Sand the affected area, clean thoroughly with degreaser, apply primer, and repaint. In severe cases, you may need to strip and start over.
Problem: Color Inconsistency or Streaking
Solution: This often occurs when coats are applied too thin or when there are interruptions in the application. Ensure consistent paint thickness and maintain wet edges. For existing streaks, sand lightly and apply another even coat.
Problem: Blisters or Bubbles
Solution: Usually caused by painting over a surface that wasn’t properly cleaned or when painting in high humidity. Sand the area, ensure the surface is clean and dry, then reapply primer and paint.
Prevention Tip: The best way to avoid problems is to follow the preparation and application steps carefully. Rushing the process is the most common cause of cabinet painting failures.
Maintaining Your Painted Cabinets
Proper maintenance ensures your cabinet investment lasts for many years and maintains its professional appearance.
Cleaning Guidelines:
Use a soft cloth with mild soap and water for regular cleaning. Avoid harsh chemicals, abrasive cleaners, or scrubbing pads that might damage the finish. For grease buildup, use a solution of warm water and mild dish soap.
Immediately clean up spills to prevent staining. Wipe in the direction of the wood grain to avoid scratching the surface.
Protective Measures:
Use felt pads on the inside of cabinet doors to prevent rattling and protect the finish. Install soft-close hinges and drawer slides to prevent slamming that could damage the paint over time.
Use trivets and coasters to protect painted surfaces from heat and moisture. In kitchen environments, these simple precautions can significantly extend the life of your paint job.
Annual Maintenance: Once a year, consider applying a thin coat of furniture wax to high-use areas to provide additional protection and maintain the finish’s appearance.
Conclusion
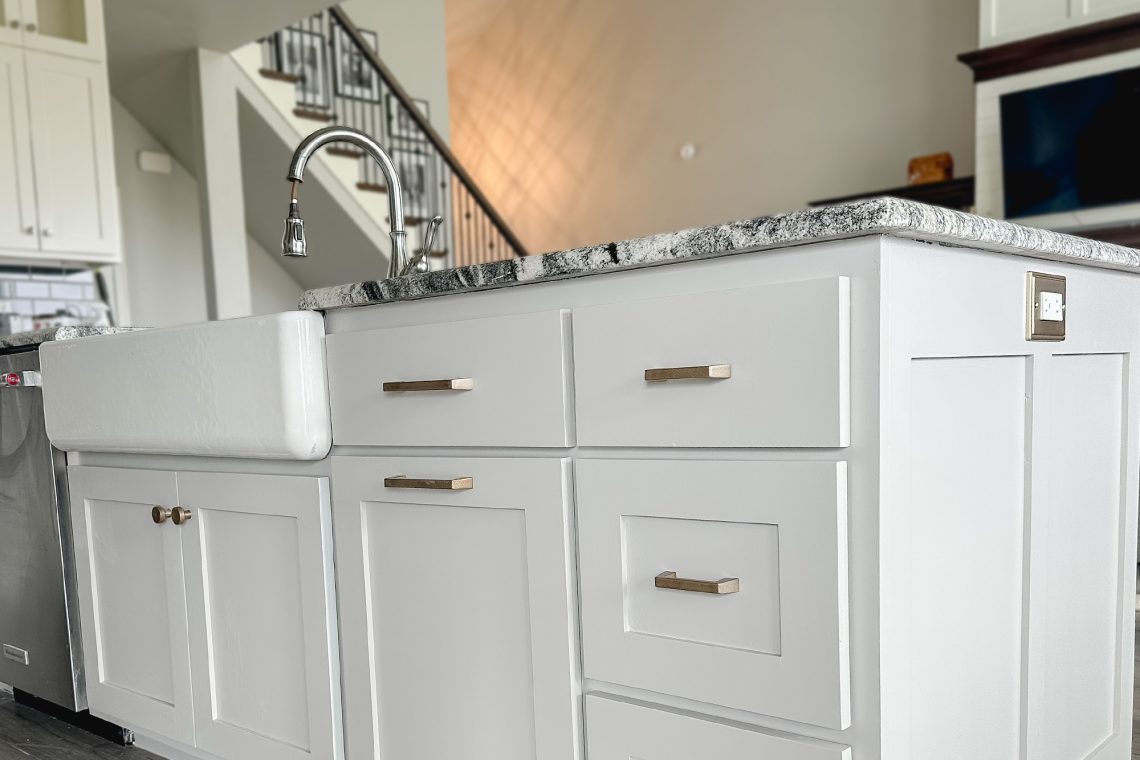
Reiterating that patience and meticulous prep work are the secrets to a stunning and durable cabinet transformation, this project requires dedication but offers incredible value. The transformation you’ll achieve by painting your kitchen cabinets is remarkable, providing an updated look that can completely change the feel of your kitchen space without the expense of full cabinet replacement.
Remember that the quality of your preparation directly correlates to the quality of your final result. Taking time to properly clean, sand, prime, and paint will ensure your cabinets look professional and last for years to come.
The investment in quality materials and proper preparation pays dividends in durability and appearance. Don’t cut corners on primer or paint quality – these are the elements that determine how your cabinets will look and perform over time.
With proper technique and patience, you’ll have professional-looking cabinets that you can be proud of and enjoy for many years. The satisfaction of completing this challenging project and seeing the dramatic transformation of your kitchen space makes the effort worthwhile.
Finally, don’t be discouraged if the process seems daunting at first. Breaking it down into manageable steps and following this guide closely will lead to success and a beautiful kitchen that reflects your personal style.


