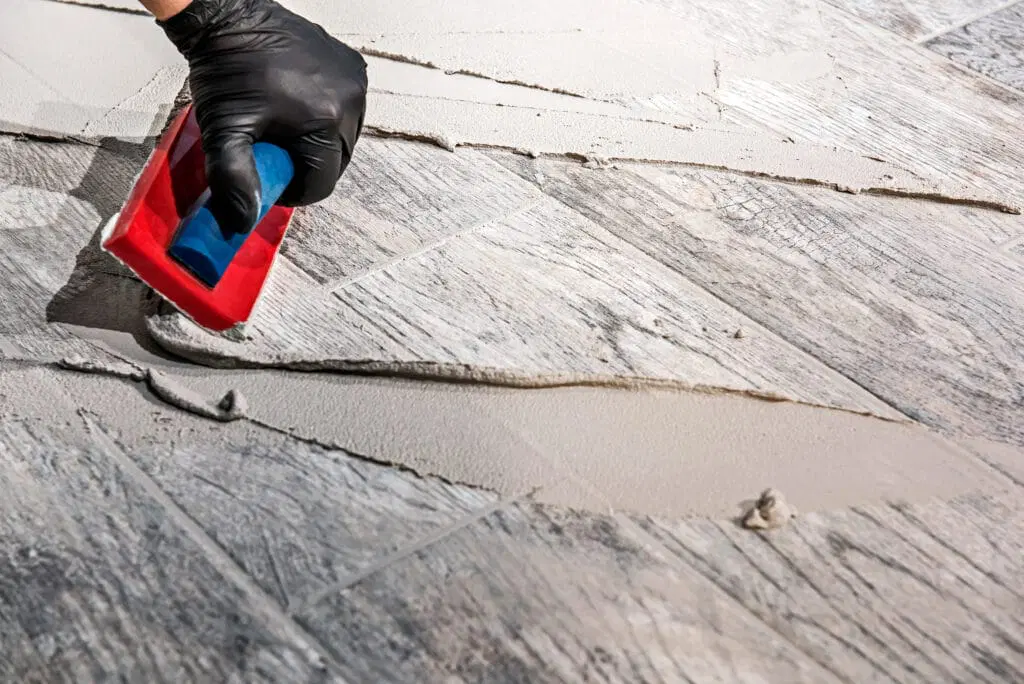
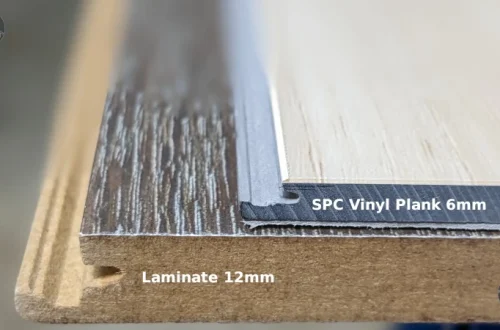
Grout is often considered just a functional necessity in tile installations, but it’s actually a crucial, functional component of any tile job that dramatically impacts the final appearance and longevity of your project. Far from being just a utilitarian element, grout serves both structural and aesthetic purposes in tile installations. Understanding the different types of grout, how to select the appropriate color, and how to properly maintain it will ensure your tile installation looks fresh and clean for years to come. The grout you choose and how you maintain it can either enhance your beautiful tile work or become a source of ongoing frustration. This comprehensive guide will provide you with the knowledge needed to make informed decisions about grout selection and maintenance, ensuring your tile projects remain beautiful and durable over time.
Part 1: Types of Grout (Sanded vs. Unsanded)
Understanding the different types of grout is essential for achieving proper installation and long-lasting results. Each type is designed for specific applications and joint widths.
Sanded Grout:
Sanded grout contains fine sand particles that add strength and prevent shrinkage cracking in wider joints. It’s designed for joints that are 1/8-inch (3mm) or wider, making it suitable for most ceramic, porcelain, and stone tile installations.
Advantages: Provides better structural support for wider joints, resists shrinkage and cracking, and is generally more affordable than unsanded grout.
Best Applications: Floor installations, large format tiles with wider joints, and any installation where joints exceed 1/8 inch in width.
Application Tip: Use sanded grout for joints 1/8″ and wider. The sand particles help prevent the grout from shrinking and cracking in these larger spaces.
Unsanded Grout:
Also called non-sanded grout, this type contains no sand particles and is formulated to be smooth and non-abrasive. It’s designed for narrow joints less than 1/8-inch wide and is essential for delicate tile surfaces.
Advantages: Won’t scratch delicate tile surfaces, provides a smoother finish, and is ideal for smaller joints where sanded grout might not fit properly.
Best Applications: Wall installations, glass tiles, polished stone, and any installation with joints narrower than 1/8 inch.
Part 2: Choosing a Color
Grout color selection is where functionality meets design, and the choice you make will have a lasting impact on the appearance of your tile installation.
Matching Color Approach:
Choosing a grout color that closely matches your tile creates a more continuous, unified look where the tile becomes the star. This approach minimizes the grid effect and makes the installation appear more like a solid surface.
Benefits include: hiding dirt better (since the grout and tile colors blend), creating a more seamless appearance, and allowing the tile’s pattern or texture to be the primary visual element.
Contrasting Color Approach:
Selecting a grout color that contrasts with your tile creates a bold, graphic pattern that highlights the individual tiles. This approach emphasizes the design and geometry of your installation.
Benefits include: creating visual interest and pattern, defining the shape of each tile clearly, and adding a decorative element to the installation.
Color Selection Tip: Test grout colors in multiple lighting conditions throughout the day. Colors can appear dramatically different in morning light versus evening artificial light, which will affect the final appearance of your installation.
Neutral Color Advantages:
Neutral grout colors (beige, gray, white) tend to be more forgiving over time and hide dirt better than bright or bold colors. They also pair well with most tile colors and remain timeless as design trends change.
Part 3: Why You MUST Seal Your Grout
Sealing grout is an absolutely essential step that many homeowners either forget or consider unnecessary, but it’s crucial for protecting your tile installation.
The Porous Nature of Grout:
Cement-based grout is naturally porous, similar to a sponge. This porosity allows it to absorb stains, moisture, and bacteria, which can lead to permanent discoloration, mold growth, and hygiene issues.
Without proper sealing, even light-colored grout will quickly become stained and discolored, especially in high-moisture areas like bathrooms and kitchens.
Critical Sealing Information: Sealing grout is essential to prevent it from absorbing stains and moisture, which can lead to permanent damage and require costly regrouting. This step is non-negotiable for maintaining beautiful, long-lasting tile installations.
Sealing Process:
Wait for the grout to cure completely before sealing (typically 48-72 hours after grouting, but check manufacturer instructions). Clean the grout thoroughly to remove any residue or haze before applying sealer.
Apply the sealer evenly using a small brush or applicator, ensuring complete coverage. Allow the sealer to penetrate for the recommended time, then wipe away excess with a clean cloth.
Part 4: The Best Way to Clean Grout
Maintaining clean grout requires both regular cleaning and periodic deep cleaning to prevent buildup and maintain appearance.
Regular Cleaning Methods:
- pH-Neutral Cleaners: Use grout-specific cleaners or mild dish soap mixed with warm water for regular maintenance. These won’t break down the sealer or damage the grout.
- Stiff Brush Cleaning: Use a soft-bristled brush or grout brush to agitate the grout lines and remove dirt and debris that regular mopping might miss.
- Vinegar Solution: A solution of equal parts white vinegar and water works well for periodic cleaning and has natural antimicrobial properties.
Deep Cleaning Techniques:
- Baking Soda Paste: Make a paste with baking soda and water, apply to grout lines, scrub with a brush, then rinse thoroughly.
- Steam Cleaning: For sealed grout, steam cleaning can effectively remove deep-set stains without using chemicals.
- Oxygen Bleach: For tough stains, use oxygen bleach (not chlorine bleach) mixed with water, following manufacturer instructions carefully.
Cleaning Tip: Clean grout regularly to prevent buildup. It’s much easier to remove fresh dirt than to clean heavily soiled grout. Weekly cleaning with a pH-neutral cleaner maintains grout appearance and extends the life of the sealer.
Grout Selection for Different Applications
Not all grout is suitable for every application. Understanding which type to use for specific installations ensures both aesthetic appeal and long-term durability.
Floor Applications:
For floor installations, use sanded grout in joints 1/8 inch and wider. The sand particles provide additional strength to withstand foot traffic and prevent cracking. In high-traffic areas, consider using premium grouts with enhanced durability.
Wall Applications:
Walls typically have narrower joints and are subject to different stresses than floors. Unsanded grout is often appropriate for wall installations, especially with glass or polished stone tiles that might be scratched by sanded grout.
Specialty Applications:
- Shower and Bath Areas: Use grouts specifically formulated for wet environments. Consider epoxy grouts for areas with heavy moisture exposure.
- Outdoor Installations: Use grouts rated for exterior use that can withstand freeze-thaw cycles.
- Large Format Tiles: These often require wider grout joints to accommodate size variations between tiles.
Maintenance and Restoration
Proper maintenance extends the life of your grout and keeps your tile installation looking its best over time.
Re-Sealing Schedule:
Test grout seal effectiveness annually by placing a water droplet on the grout. If it absorbs within 5 minutes, it’s time to reseal. Typically, grout needs resealing every 1-3 years depending on traffic and cleaning frequency.
Before resealing, clean the grout thoroughly and ensure it’s completely dry. Apply sealer following manufacturer instructions and allow adequate curing time before exposing to moisture.
Maintenance Tip: Keep a small container of matching grout on hand for minor touch-ups. Small chips or cracks can be filled and blended to maintain appearance without a full regrouting project.
When to Consider Regrouting:
Regrouting may be necessary when grout is extensively stained, cracked, or damaged beyond repair. This is typically a larger project best undertaken by professionals for complex installations.
Signs that regrouting may be needed: persistent stains that won’t clean, crumbling or missing grout, or water penetration issues that sealer won’t resolve.
Troubleshooting Common Grout Problems
Understanding common grout issues and their solutions helps maintain your installation and avoid more serious problems.
Problem: Grout Staining Despite Sealing
Solution: Ensure the grout was completely cured before sealing, and check if a second coat of sealer is needed. Some types of stains may require specialized removal products.
Problem: Grout Cracking or Crumbling
Solution: This may indicate incorrect mixing, inadequate substrate preparation, or movement in the installation. In severe cases, regrouting may be necessary.
Problem: Grout Color Variations
Solution: This can occur due to uneven mixing, inconsistent application, or exposure to moisture during curing. Prevention through proper technique is more effective than correction after installation.
Problem: Grout Not Adhering
Solution: This often occurs when tiles weren’t properly cleaned before grouting or when grout was mixed incorrectly. Ensure tiles are clean and follow mixing instructions precisely.
Conclusion
Summarizing that giving a little thought to grout choice and maintenance is the key to keeping your tile looking fresh and clean for years. Understanding the differences between sanded and unsanded grout, the importance of proper sealing, and the best cleaning methods will ensure your tile installation remains beautiful and hygienic for years to come.
The investment in quality grout, proper installation techniques, and ongoing maintenance pays dividends in the longevity and appearance of your tile installation. Taking the time to make informed decisions about grout selection and maintenance ensures your tile project will be a lasting addition to your home.
Remember that grout maintenance is an ongoing process, not a one-time task. Regular cleaning and periodic resealing will preserve the investment you’ve made in your tile installation and keep it looking its best for many years.
By following the guidelines in this comprehensive guide, you’ll be well-equipped to select, install, and maintain grout that enhances your beautiful tile work while ensuring its durability and longevity.
Proper grout care is an essential part of any tile installation, and the attention you pay to this functional yet aesthetic element directly impacts the overall success of your project.


