Imagine stepping outside your door and plucking fresh basil for your pasta, or snipping some rosemary for your roast. The joy of cooking with fresh herbs is undeniable, but not everyone has the luxury of a sprawling garden. For those with limited space – whether that’s a small patio, balcony, or just a sunny windowsill – a vertical herb garden is the perfect, space-saving solution. This DIY project is not only functional but can add a beautiful, living wall of green to your home. In this comprehensive guide, we’ll walk you through creating your own vertical herb garden from start to finish.
Why Go Vertical?
Vertical gardening has become increasingly popular for good reason. The primary advantage for small spaces is, of course, space efficiency. You can grow a surprisingly diverse selection of herbs in a fraction of the ground space required for a traditional garden bed. This is especially valuable in urban environments or for apartment dwellers.
Additionally, vertical gardens add an aesthetic dimension to your living space. They turn a blank wall into a living, breathing piece of art that changes with the seasons. The visual appeal of a lush, green wall can transform a plain balcony or patio.
From a practical standpoint, harvesting herbs from a vertical garden is cleaner and easier. Rather than bending down to the ground, you can simply reach out and pluck what you need. This is particularly beneficial for individuals with mobility limitations.
Moreover, vertical gardens can provide better growing conditions for your herbs. They receive more direct sunlight exposure throughout the day if mounted on a sunny wall, and the improved air circulation reduces the likelihood of fungal diseases.
Materials & Tools Checklist
Before diving into construction, gather all the necessary materials and tools. The beauty of this project lies in its simplicity, using readily available items from your local hardware store or home improvement center.
Materials Needed:
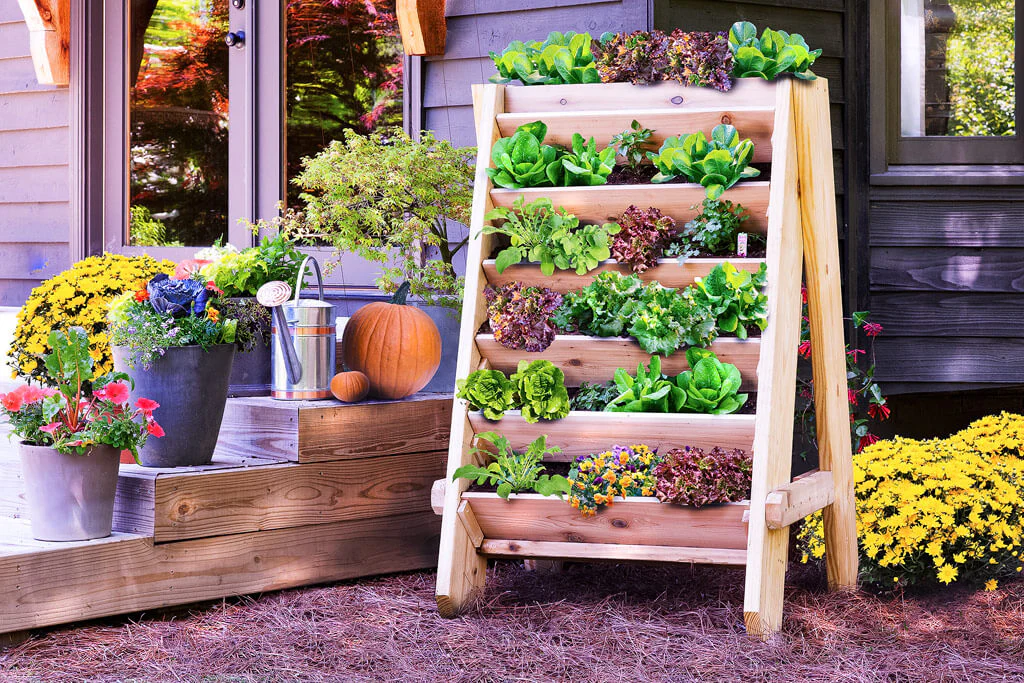
- One large piece of cedar or pallet wood (for the backboard): approximately 24 inches wide and 36 inches tall, 3/4-inch thick
- Four wooden dowels or small branches: approximately 18 inches long, 3/4-inch diameter
- Eight small wooden brackets or pieces of scrap wood to hold the dowels
- Wood stain or sealant suitable for outdoor use
- Screws or brackets for mounting the board to the wall
- Potting soil (preferably a high-quality, well-draining mix)
- Small pots or containers for the herbs (or use the dowel system to hang small pots)
Tools Needed:
- Drill with bits
- Screwdriver
- Saw (if cutting wood to size)
- Sandpaper (medium grit)
- Measuring tape
- Level
- Pencil for marking
- Paintbrush or rag for applying stain
When selecting wood, cedar is an excellent choice as it’s naturally resistant to weather and insects. However, any untreated wood can work if you plan to properly seal it. Pallet wood can be used if it’s heat-treated (HT) and not chemically treated (avoid MB – methyl bromide).
Step-by-Step Building Guide
Pro Tip: Have your lumber cut to size at the hardware store to save time and ensure accuracy.
Step 1: Measure, Cut, and Assemble the Frame
Start by measuring and cutting your backboard to the desired size. A 24×36 inch board provides ample space for multiple herbs. If the wood isn’t pre-cut, use a saw to get the dimensions right, and sand down any rough edges with medium-grit sandpaper.
Decide on the placement of your pot holders or shelves. For this design, we’ll use dowels to hang small pots. Mark the positions for the dowels on the backboard. Space them evenly, for example, 8 inches apart vertically, ensuring there’s enough room for the pots to hang without touching each other or the wall.
Drill pilot holes where you marked for the dowels. These holes should be slightly smaller than the dowel diameter to provide a snug fit. The depth should be enough for the dowels to be securely inserted but not to go completely through the board.
Step 2: Sand and Seal the Wood for Weather Protection
Thoroughly sand the entire surface of the wood, including the edges, with medium-grit sandpaper to remove splinters and smooth the surface. Wipe away any dust with a clean, damp cloth.
Apply an outdoor wood stain or sealant to protect the wood from moisture, UV rays, and weathering. This is a crucial step to ensure the longevity of your vertical garden. Follow the manufacturer’s instructions for application and drying time. Apply at least two coats for better protection. Let it dry completely between coats.
Step 3: Attach the Pot Holders or Dowels
Once the wood is completely dry, insert the dowels into the pre-drilled holes. Ensure they are level and secure. You can apply a small amount of wood glue in the holes for extra stability before inserting the dowels.
If you prefer fixed shelves instead of dowels, cut small pieces of wood to act as brackets. Attach these brackets to the backboard using screws, ensuring they are level. Then place the pots on top of these brackets.
Step 4: Mount the Garden Securely to a Wall or Fence
Before mounting, determine the best location for your vertical herb garden. Choose a spot that receives 4-6 hours of sunlight daily, ideally morning sun. Check the wall to ensure it can support the weight of the board, soil, and plants.
Use a level to mark the mounting points on the wall. Pre-drill holes if mounting on masonry or siding. Secure the backboard to the wall using appropriate anchors and screws. Ensure it is firmly attached and level. If mounting on a fence, simply attach it with screws or brackets.
Best Herbs for Vertical Gardens
Selecting the right herbs for your vertical garden ensures success and continuous harvest. Some herbs are more suited to container growing and smaller spaces than others.
Beginner-Friendly Herbs:
- Basil: Thrives in warm, sunny conditions. Pinch flowers to encourage leaf growth. Perfect for Italian dishes.
- Parsley: More tolerant of partial shade than many herbs. Both flat-leaf and curly varieties grow well in pots.
- Thyme: A hardy perennial that grows well in smaller containers. Requires minimal water once established.
- Chives: Extremely easy to grow and can be harvested frequently. Tolerates cooler temperatures well.
- Mint: Grows vigorously and is best kept in its own pot to prevent spreading. Perfect for teas and cocktails.
Important Note: Mint is extremely invasive and will take over other pots if not contained. Always plant mint separately from other herbs.
Intermediate Herbs:
- Rosemary: Prefers well-draining soil and full sun. Its woody stems make it an attractive addition to the vertical garden.
- Oregano: A Mediterranean herb that thrives in conditions similar to rosemary. Can be quite pungent, so a little goes a long way.
- Sage: Another Mediterranean herb with distinctive fuzzy leaves. Requires minimal water.
When planting, consider the specific needs of each herb. Some prefer more water (basil, parsley), while others are drought-tolerant (rosemary, thyme). Group herbs with similar water and light requirements together in your vertical garden.
Herb Care and Maintenance
Maintaining a vertical herb garden is somewhat different from a traditional garden. The elevated position may cause containers to dry out more quickly, and plants may be more exposed to wind and temperature fluctuations.
Watering:
Check soil moisture daily during hot weather. Water when the top inch of soil feels dry. Since the garden is vertical, water may run off more quickly. Consider using a watering can with a narrow spout to direct water to the base of each plant.
Ensure all containers have drainage holes to prevent root rot. If using decorative pots without drainage, place the growing pot inside a decorative one, removing the inner pot to water.
Fertilizing:
Container-grown herbs require more frequent fertilization than those grown in the ground. Use a balanced, water-soluble fertilizer every 2-3 weeks during the growing season, following package directions. Alternatively, mix slow-release fertilizer granules into the potting soil at planting time.
Harvesting:
Regular harvesting encourages bushier growth and prevents herbs from flowering (which can reduce flavor). When harvesting, cut just above a pair of leaves to encourage branching. Never remove more than one-third of the plant at once.
Seasonal Care:
In colder climates, many herbs are annuals and will need to be replanted each year. Tender herbs like basil will die with the first frost. Consider growing cold-hardy herbs like parsley and chives that can survive cooler temperatures, or bring potted herbs indoors during winter.
Maximizing Growth in Your Vertical Garden
To ensure your vertical herb garden thrives, consider these additional tips beyond basic care:
Maximizing Sunlight Exposure:
South-facing walls typically receive the most sunlight, making them ideal for sun-loving herbs like basil, rosemary, and oregano. East-facing walls provide morning sun, which is gentler and suitable for herbs that prefer partial shade.
Rotate pots periodically if only one side of the plant is getting sun, allowing for even growth. However, be mindful that some herbs may not like frequent relocation.
Companion Planting:
While in a vertical garden the plants are physically separated, consider the principles of companion planting when choosing which herbs to grow together. Basil and oregano, for example, are said to enhance each other’s flavor when grown together.
Dealing with Pests:
Vertical gardens can still attract common pests like aphids, spider mites, or whiteflies. Inspect plants weekly for signs of infestation. Early detection is key.
Many herbs naturally repel insects. Basil deters flies and mosquitoes, while mint repels ants and aphids. The elevated position may also make it harder for some ground-dwelling pests to reach the herbs.
If pests are found, try natural remedies first: a spray of water to dislodge aphids, neem oil for mites, or a mild soap solution.
Expanding Your Vertical Garden
Once you’ve mastered the basic vertical herb garden, consider expanding its functionality:
Adding Other Plants:
While herbs are the focus, consider adding small flowering plants for visual appeal or to attract beneficial insects. Marigolds, petunias, or small varieties of nasturtiums can complement herbs beautifully.
Creating a Larger System:
If your first vertical garden is successful, consider creating a more extensive system. Multiple boards can be installed side by side or at different heights to create a living wall effect.
Seasonal Adaptation:
Rotate your plantings seasonally. Replace tender summer herbs with cold-tolerant varieties in fall, or add decorative elements like small ornamental grasses during winter months to maintain visual interest.
Integrating Technology:
Consider adding a simple drip irrigation system for consistent watering, especially if you travel frequently. Or use a moisture meter to take the guesswork out of watering.
Common Mistakes to Avoid
Even with the best intentions, new gardeners often make mistakes. Awareness of these common pitfalls can save your vertical herb garden:
Overwatering:
It’s a common misconception that plants need constant water. Overwatering can lead to root rot and other diseases. Always check soil moisture before watering.
Insufficient Light:
Most culinary herbs require at least 4-6 hours of direct sunlight. If your herbs look pale, stretched, or are dropping leaves, they may not be getting enough light.
Choosing the Wrong Location:
While herbs love sun, extreme heat can stress them. In very hot climates, consider a location that gets morning sun but afternoon shade.
Not Pruning Regularly:
Herbs become leggy and less productive without regular harvesting/pruning. This is especially true for basil, which will flower and stop producing leaves if not regularly pinched.
Planting Incompatible Herbs Together:
As mentioned, mint is invasive. Also, herbs with different water needs should ideally be kept separate to prevent some from being over or underwatered.
Conclusion
Creating a DIY vertical herb garden is an incredibly rewarding project that maximizes your growing space while adding beauty to your small outdoor areas. The process of building and tending to your own herb wall connects you with your food in a meaningful way, and the joy of harvesting fresh herbs for your cooking cannot be overstated.
This project is accessible to gardeners of all skill levels, requiring only basic tools and a few materials. While the initial setup requires some effort, the ongoing maintenance is minimal, and the rewards are significant.
Remember, gardening is a learning process. Don’t be discouraged if some herbs don’t thrive initially. Each season brings new opportunities to experiment and improve. With proper care and attention to the specific needs of each herb, your vertical garden will flourish and provide fresh flavors to your kitchen year after year.
Start small, learn as you grow, and expand your garden as your confidence and experience increase. The taste and aroma of herbs grown in your own vertical garden will make every meal a little more special.