For beginners feeling intimidated by the vast world of power tools, building a workshop can feel overwhelming. The market is flooded with countless specialized tools, each claiming to be the essential addition to your collection. However, this comprehensive guide breaks down the five most versatile and essential power tools that form the foundation of any successful DIY woodworking workshop. These tools have been carefully selected to provide the most functionality for a wide variety of projects while being accessible to beginners. Whether you’re planning to build basic furniture, tackle home improvement projects, or dive into more complex woodworking pieces, these five tools will serve as your core foundation. The right combination of these essential tools allows you to execute an astonishing variety of woodworking projects, from simple shelves to complex joinery, making them invaluable investments for your crafting journey.
Tool 1: The Cordless Drill/Driver
The cordless drill/driver is absolutely the workhorse of any workshop, indispensable for drilling holes and driving screws across a wide range of projects. No other tool is used more frequently in basic woodworking projects. Modern cordless drills offer sufficient power and versatility to handle everything from delicate assembly work to heavy-duty fastening tasks.
Key Features to Consider:
- Variable Speed: Allows for better control when drilling delicate materials or driving different types of screws
- Multiple Torque Settings: The clutch allows you to switch between driving screws and drilling holes, preventing stripped screws
- Chucking Capacity: Determines the maximum bit shank size the drill can accept (typically 3/8″ or 1/2″)
- Battery Voltage: 18V or 20V models offer the best balance of power and portability for most projects
- LED Work Light: Illuminates the work area, especially helpful in dimly lit spaces
Bit Selection: Invest in a quality drill bit set that includes both wood bits and screwdriver bits. Spade bits, Forstner bits, and Brad-point bits are particularly useful for woodworking applications.
Drill vs. Driver Functionality:
Modern drills combine both drilling and driving functions in one tool. The main clutch allows you to set the torque to prevent overdriving screws, while the drill function provides maximum power for boring holes. This dual functionality makes the drill/driver incredibly versatile.
For wood projects, consider using square-drive or Torx bits instead of standard Phillips bits, as they’re less likely to slip out or strip during use.
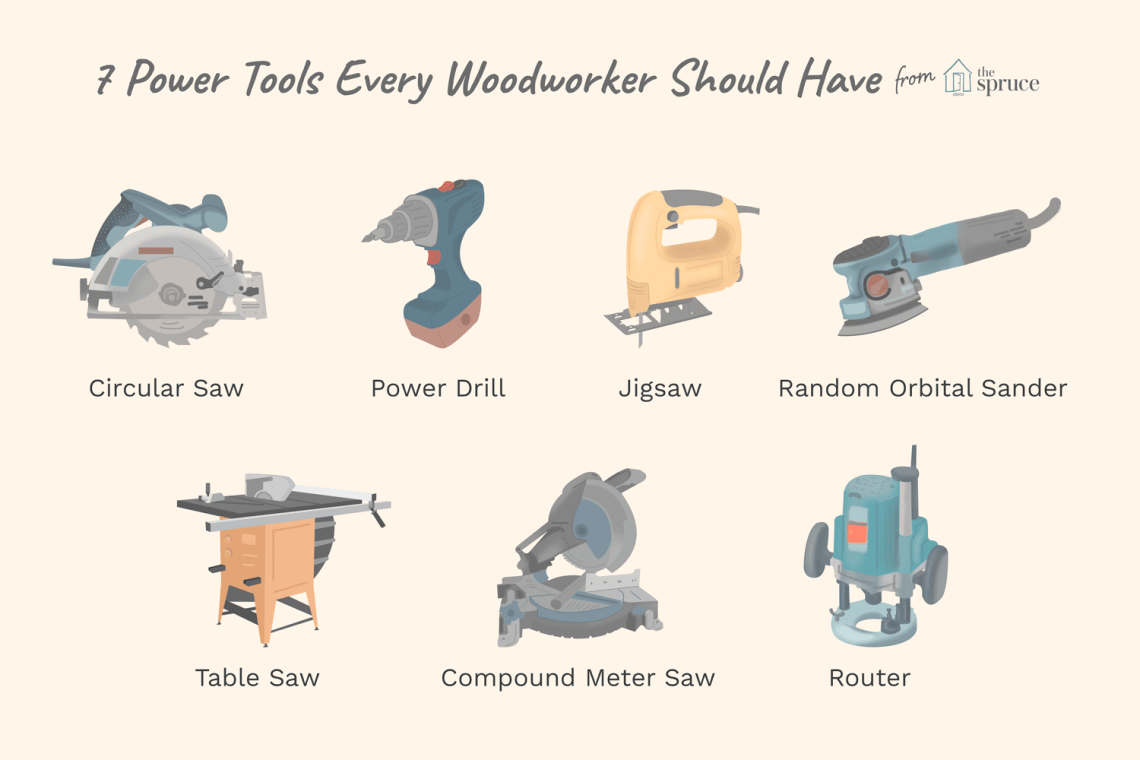
Tool 2: The Circular Saw
The circular saw is the go-to tool for making straight cuts in all types of wood. It’s the affordable, portable alternative to a table saw and is essential for breaking down sheet goods like plywood. Despite its reputation for being difficult to use precisely, proper technique makes it capable of producing clean, accurate cuts.
Key Features for Woodworking:
Look for a circular saw with a clear line of sight to the cut line, achieved through a good shoe design and blade visibility. An adjustable depth stop allows you to cut partially through materials for dadoes or rabbets.
Blade quality is crucial – use a carbide-tipped blade with 40-60 teeth for smooth wood cuts. A sharp blade makes cleaner cuts and reduces the risk of kickback.
Safety Tip: Always use a guide when making cuts with a circular saw. A straightedge clamped to your workpiece will ensure perfectly straight, accurate cuts and is much safer than freehand cutting.
Best Uses for a Circular Saw:
- Breaking down sheet goods (plywood, MDF)
- Crosscutting lumber to length
- Making straight rip cuts
- Cutting long pieces when a miter saw won’t reach
- Creating straight lines when a table saw isn’t available
Technique for Accurate Cuts:
Always cut with the waste side of your cut line to ensure accuracy. Mark your cut line clearly and ensure your circular saw’s shoe is flat against the workpiece. Use a guide for long cuts to ensure straightness.
Tool 3: The Random Orbit Sander
The random orbit sander is the secret to achieving a professional, glass-smooth finish that’s nearly impossible to achieve by hand. This tool combines orbital motion with rotation, eliminating the swirl marks typically associated with traditional orbital sanders while remaining much more efficient than sanding by hand.
Grit Progression: Always sand through grits sequentially. Start with a coarser grit (80-120) to remove tool marks, then progress to finer grits (150, 220) for a smooth finish, and finish with extra fine grits (320+) before applying finish.
Advantages Over Hand Sanding:
The random orbit sander is far superior to hand sanding in both speed and consistency. It removes material evenly while leaving a surface that’s nearly finish-ready. The random orbit action creates microscopic swirls that don’t appear in the final finish.
For contoured surfaces, the random orbit sander follows the shape without creating the flat spots that traditional sanders might create.
Key Considerations When Choosing:
- Dust Collection: Look for models with good dust collection to keep your workspace clean and reduce cleanup time
- Variable Speed: Allows for different materials and grits, with slower speeds for finer grits
- Pad Size: 5-inch or 6-inch pads are common, with 6-inch offering more coverage area
Tool 4: The Jigsaw
The jigsaw is the master of curves, making it essential for any project that isn’t made of purely straight lines. It’s capable of making both curved cuts and straight cuts in thin materials, making it a versatile addition to your tool collection.
Best Applications:
Use a jigsaw for cutting curves, shapes, and intricate patterns in wood. It’s also excellent for making plunge cuts into the middle of a workpiece (for installing hinges or handles) and for cutting out shapes in sheet goods like plywood.
With the right blade, a jigsaw can cut through various materials including wood, plastic, and even thin metal.
Blade Selection: Use different blades for different materials. For wood, use blades with fewer teeth per inch (TPI) for faster cuts, and more TPI for smoother cuts. Always ensure the blade is appropriate for the material you’re cutting.
Techniques for Best Results:
For smooth cuts, run the jigsaw at a consistent speed and don’t force the blade through the material. Let the tool do the work. For curves, make relief cuts to remove waste material and reduce stress on the blade.
Use a sharp blade and ensure it’s the correct type for your material. Dull blades create rough cuts and can cause the jigsaw to bind.
Tool 5: The Miter Saw
The miter saw is the specialist for perfectly accurate crosscuts and angled cuts, which are crucial for projects like picture frames, trim work, and any project requiring precise angles. A compound miter saw can make both miter (angled) and bevel (tilted) cuts, greatly expanding its versatility.
Types of Miter Saws:
- Standard Miter Saw: Cuts angles left and right, but the blade doesn’t move forward and back
- Compound Miter Saw: Can make both angled and beveled cuts in addition to standard miter cuts
- Sliding Compound Miter Saw: Combines compound capabilities with forward/backward blade movement for cutting wider pieces
Best Uses:
Miter saws excel at cutting precise angles for trim work, picture frames, and any project where accuracy is more important than speed. The fence and miter gauges allow repeatable, accurate cuts that are difficult to achieve with other tools.
For crown molding, window trim, and door casing, a miter saw is virtually indispensable for achieving tight-fitting joints.
Accuracy Tip: Use a miter saw stand or build a simple support system to support long pieces when cutting. This prevents deflection and ensures accurate cuts.
Safety First: Non-Negotiables
Workshop safety is absolutely paramount and should never be compromised. These safety measures are non-negotiable and form the foundation of responsible woodworking.
Essential Safety Equipment: Always wear safety glasses to protect your eyes from flying debris. Hearing protection is crucial for extended use of power tools. Additionally, use appropriate respiratory protection when sanding or cutting, and consider steel-toed shoes in your workshop.
General Safety Practices:
Keep your workspace clean and organized to prevent accidents. Never carry multiple tools at once, and always have a clear path to your tools and workpieces. Ensure proper lighting so you can see what you’re doing.
Before using any power tool, familiarize yourself with its operation and safety features. Read the manual and understand all functions before beginning your project.
Tool-Specific Safety:
- Always unplug tools when changing bits, blades, or making adjustments
- Keep hands away from cutting edges and drill bits
- Use push sticks for small pieces to maintain safe hand positioning
- Never remove safety guards or use damaged tools
- Ensure your workpiece is properly secured before cutting or drilling
Budgeting for Your Essential Tools
Building a tool collection requires careful financial planning. These five essential tools represent a significant investment, but they’re crucial for your long-term woodworking success.
Quality vs. Cost: Invest in quality tools that will last rather than cheap alternatives that may need frequent replacement. A good cordless drill in the $100-150 range will serve you well, while a budget model may fail at a crucial moment.
Phased Purchase Approach:
Consider purchasing tools gradually as your budget allows. Start with the drill/driver since it’s used in virtually every project, then add the circular saw for cutting capabilities. The sander, jigsaw, and miter saw can follow based on your specific project needs.
Look for tool kits that offer multiple tools at a discount, but only if you’ll use all the included tools. Sometimes individual quality tools provide better value than comprehensive kits.
Cost Considerations:
- Drill/Driver: $50-200 (depending on battery voltage and included batteries)
- Circular Saw: $80-200 (blades sold separately)
- Random Orbit Sander: $60-150 (with dust collection)
- Jigsaw: $40-120 (variable speed models cost more)
- Miter Saw: $100-400 (depending on type and brand)
Maintaining Your Essential Tools
Proper maintenance ensures your tools perform optimally and last for years. Regular care extends the life of your investment and maintains the precision that makes these tools valuable.
General Maintenance:
Keep tools clean by removing dust and debris after each use. Wipe down tools with a dry cloth and store them properly to prevent damage. Check for loose parts and tighten as necessary.
Sharpen blades and bits regularly, or replace them when they become dull. Dull blades put unnecessary stress on tools and produce poor results.
Battery Care: For cordless tools, store batteries at room temperature and charge them regularly to maintain their capacity. Don’t store batteries completely discharged, as this can damage the cells.
Specific Tool Maintenance:
Clean circular saws’ depth and bevel adjustments to prevent dust buildup that can affect accuracy. Check the blade guard’s operation before use. For miter saws, keep the saw arm and pivot points clean and lubricated for smooth operation.
Conclusion
With this core set of five essential tools – the cordless drill/driver, circular saw, random orbit sander, jigsaw, and miter saw – you’re equipped to build an astonishing variety of projects. These tools represent the perfect balance between functionality and accessibility for beginners while providing capabilities that experienced woodworkers rely on daily.
Remember that these tools are just the beginning of your woodworking journey. The skills you develop using these tools will serve as a foundation for more advanced techniques and specialized tools as your experience grows.
Always prioritize safety over speed, and take time to learn proper techniques with each tool. Quality results come from proper technique more than expensive equipment.
Reassure beginners that with this core set of five tools, they can complete a vast array of woodworking projects successfully. The versatility of these tools means you’ll rarely encounter a project that can’t be completed with at least these basic capabilities.
Invest in quality tools that will last, maintain them properly, and they’ll provide years of reliable service as you develop your woodworking skills and complete projects that bring satisfaction and joy to your home.